This post is meant to be a helping aid to those that are using our FREE Lightroom Presets.
When it comes to Lightroom and using Lightroom presets to edit photos there are a few VERY IMPORTANT things to know. If you hate reading, you can also watch this video on Youtube (LINK)
The main one is that every camera manufacturer has a different COLOR SCIENCE. Which long story short means if you have a Canon and I have a Sony and you use my presets that I have tweaked to be for a Sony camera, you may get results you won’t like. The reason is Sony’s blues are different than Canon blues. Nikon’s greens are different than Fujifilms greens, and so on and on etc…
Here’s an article about Color Science by Petapixel if you want to go more in depth. But the gist is if you shoot in RAW it doesn’t matter and it’s all subjective. The companies had to hire scientists and engineers to get these colors from scratch. Talk about some seriously hard work.
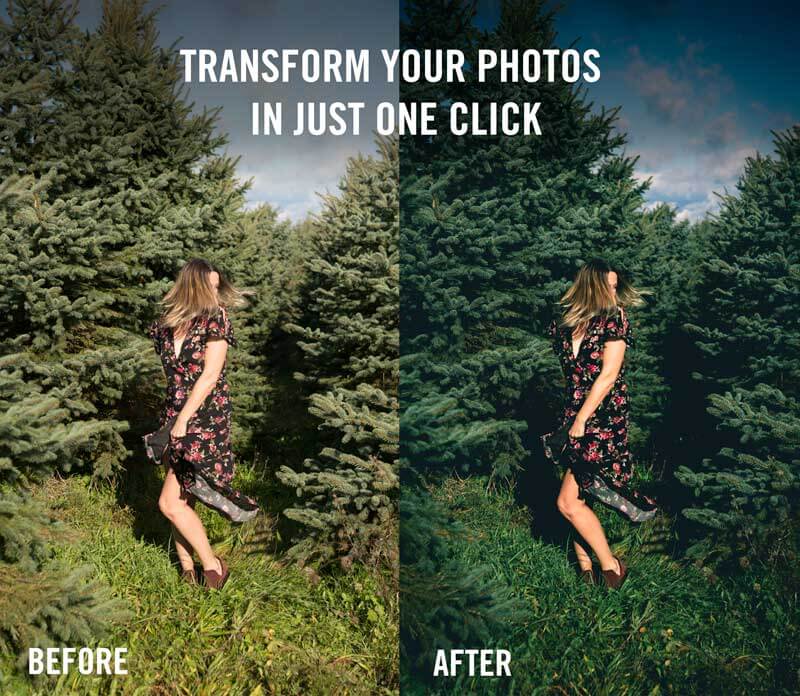
But the amazing thing is WE HAVE COMPLETE CONTROL over the colors. And this post is to try and help you learn how to take my presets, tweak them to match your tastes, and SAVE/UPDATE your very own presets you love!
Where you will want to do a majority of your work is in what is called the HSL/Color section. HSL stands for Hue, Saturation, and Luminance.
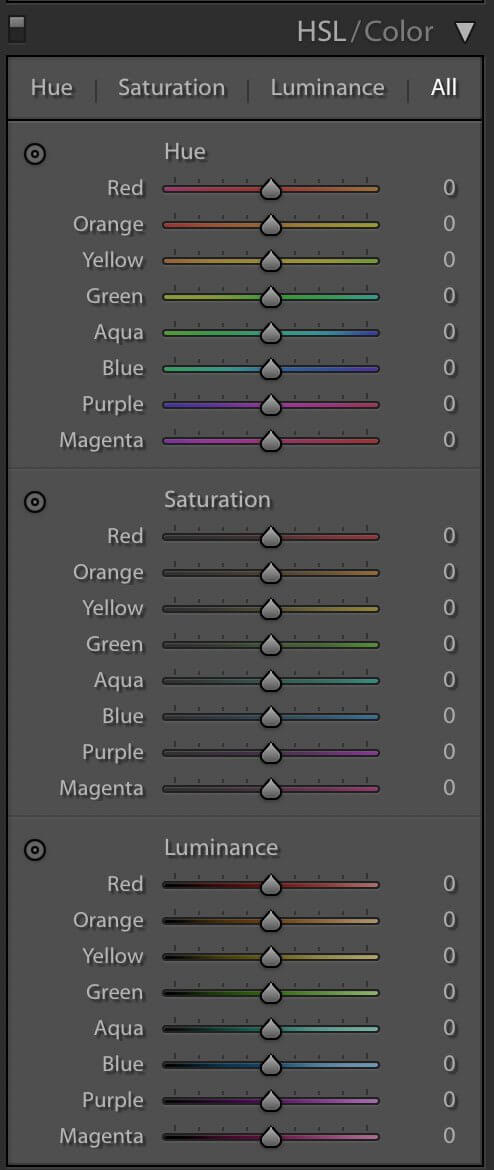
Hue adjusts the hue colors of your image. While Saturation colors how much color is in or out of your image. Meanwhile, Luminance is how bright or dark the colors in your image are. Each section has 8 colors of the prism, which also has a wonderful display of exactly what each slider does and how it affects the color.
You can move each of the sliders individually, but what is even better is to do what is called a TARGETED ADJUSTMENT. Which is where you click on the wheel to the left of adjustment you want to make, either HUE, SATURATION, or LUMINANCE, and then click on the photo and adjust the image.
You can do the same steps for Saturation as well as Luminance to get the EXACT Hue, Saturation, and Luminance of ANY COLOR you want. Without having to worry about which camera’s “COLOR SCIENCE” is the best.
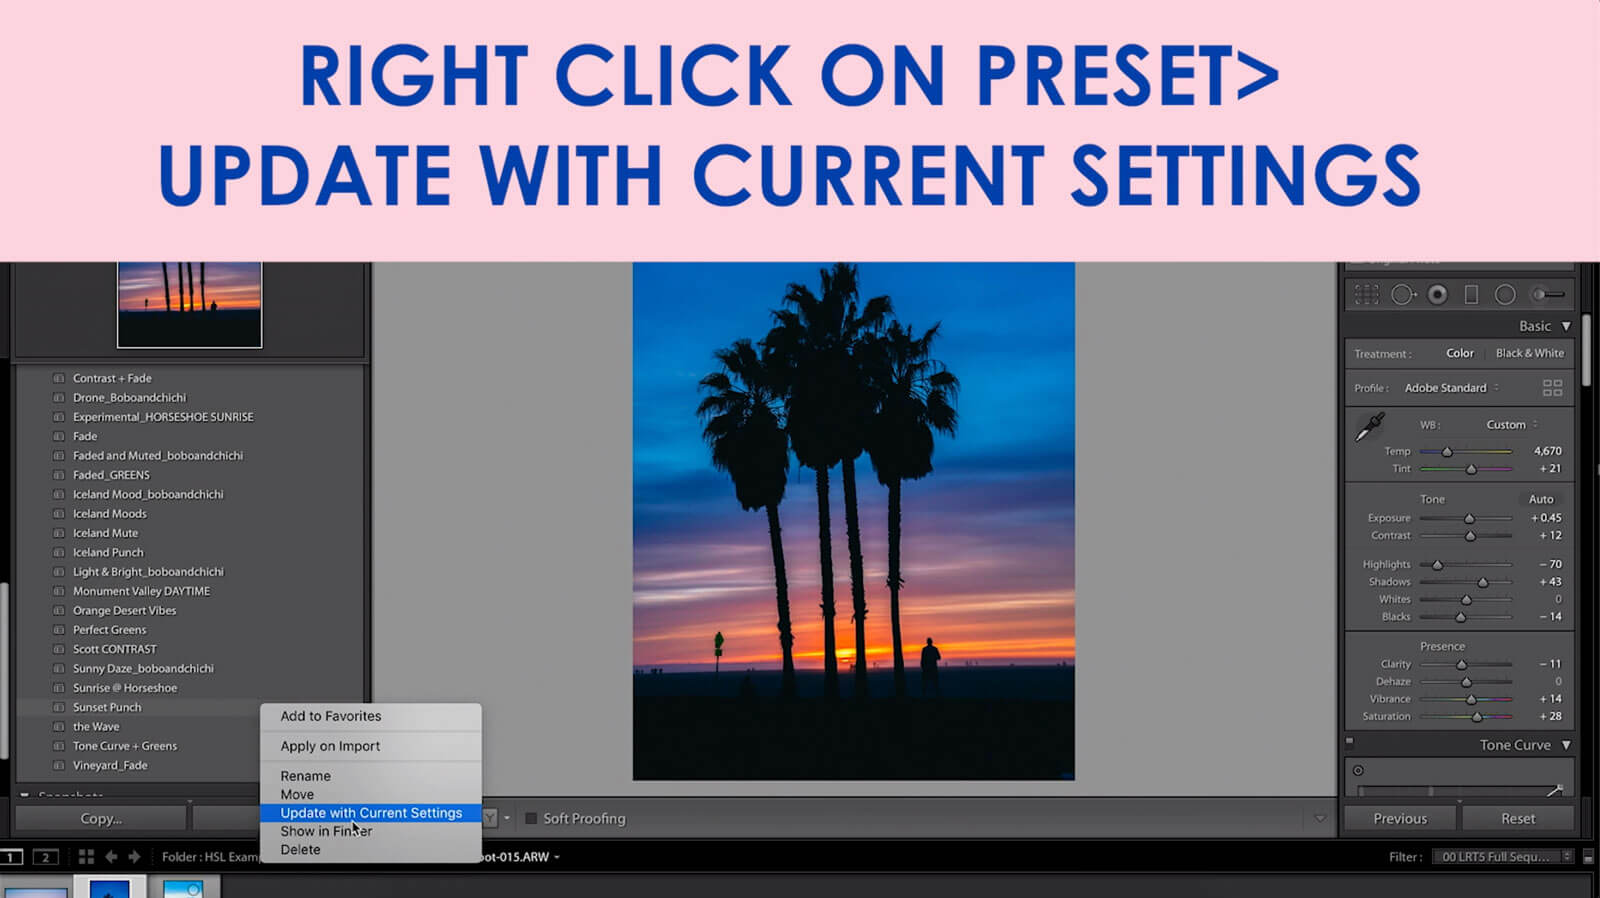
So once you have adjusted your Lightroom preset you can than just right click on the preset in your Lightroom panel, and click Update with current settings and voila! You have now customized the preset and made it your own.
I hope this helps you on your photography/lightroom journey and if you found it helpful I’d love if you’d share and or consider subscribing to our Youtube channel.